Surprise Youself With A New Food Every Week

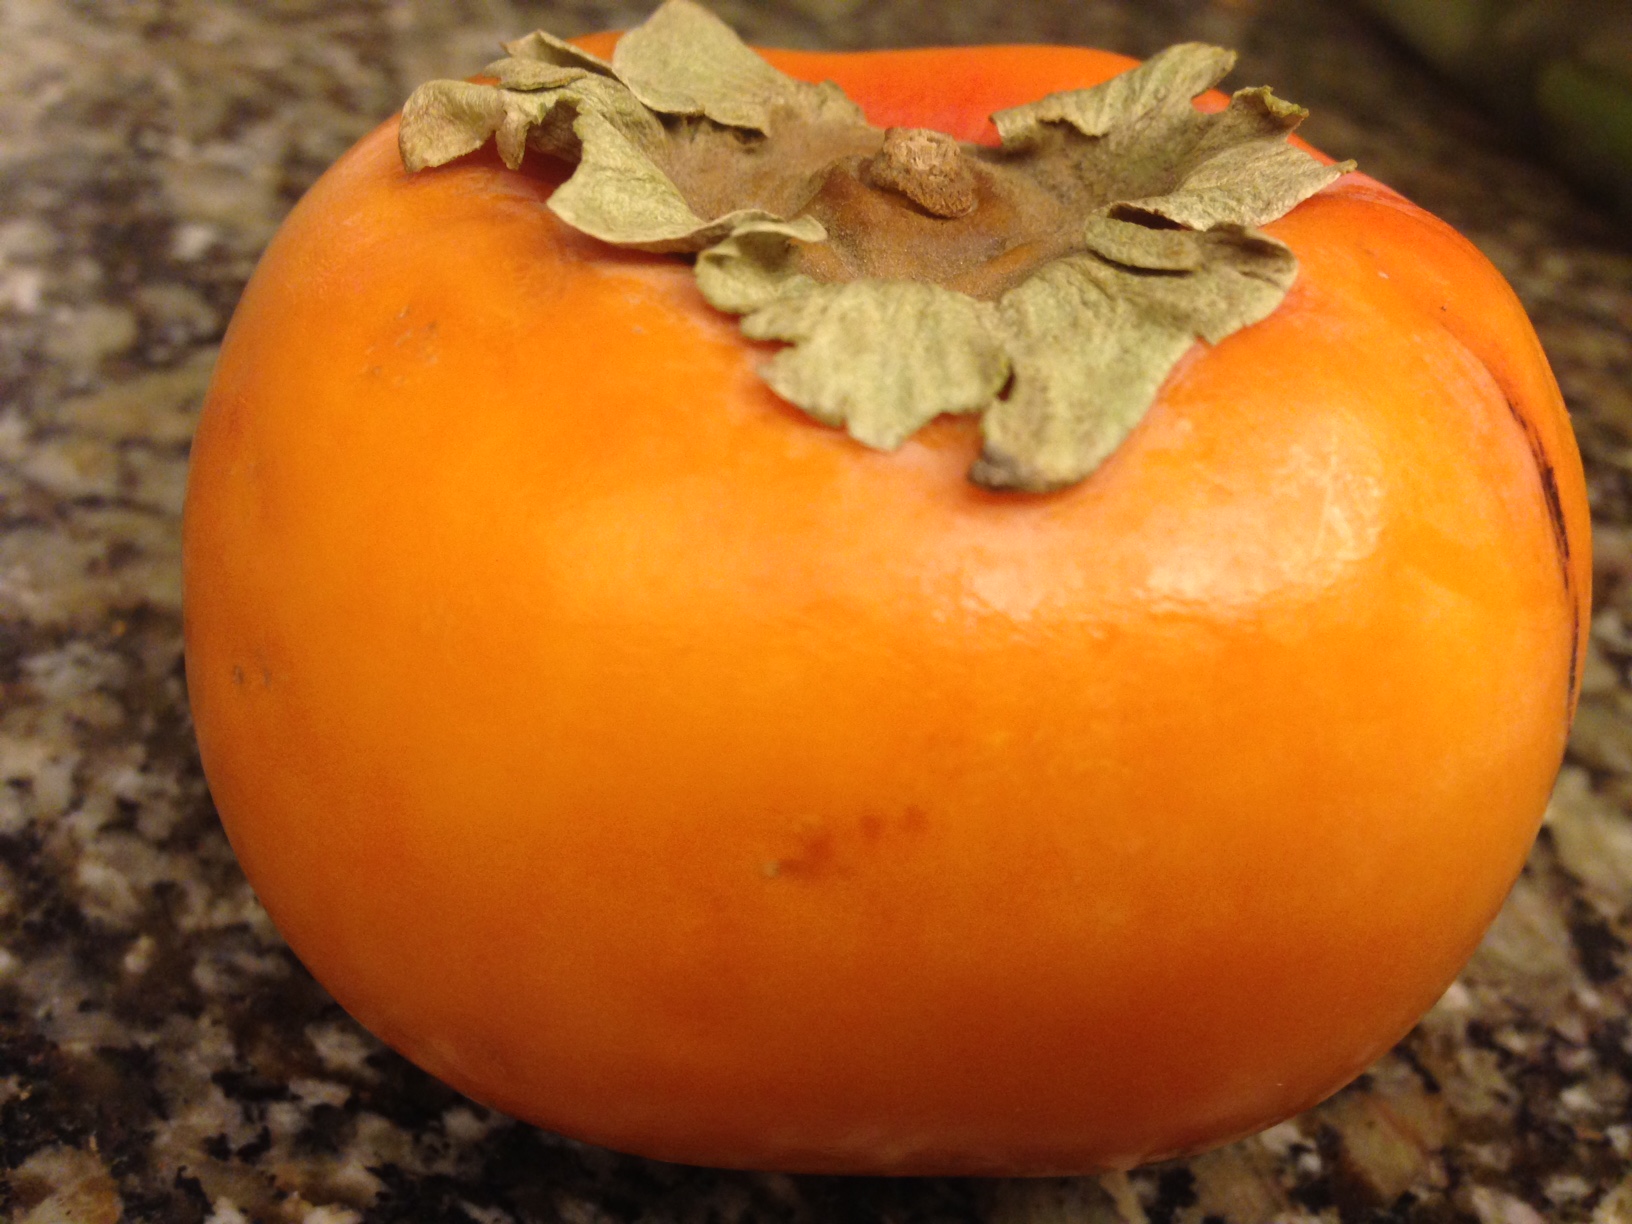
We came home from vacation and my friend who had been dog sitting had left two persimmons on the counter. I looked at the beautiful orange fruit as a gift and a sign to prepare my next meal with a new food. I’m sure I’ve eaten this fruit before, but my memory could not bring up the flavors so I pulled up some info on the characteristics and then looked into my favorite recipes to find a place for it. persimmon

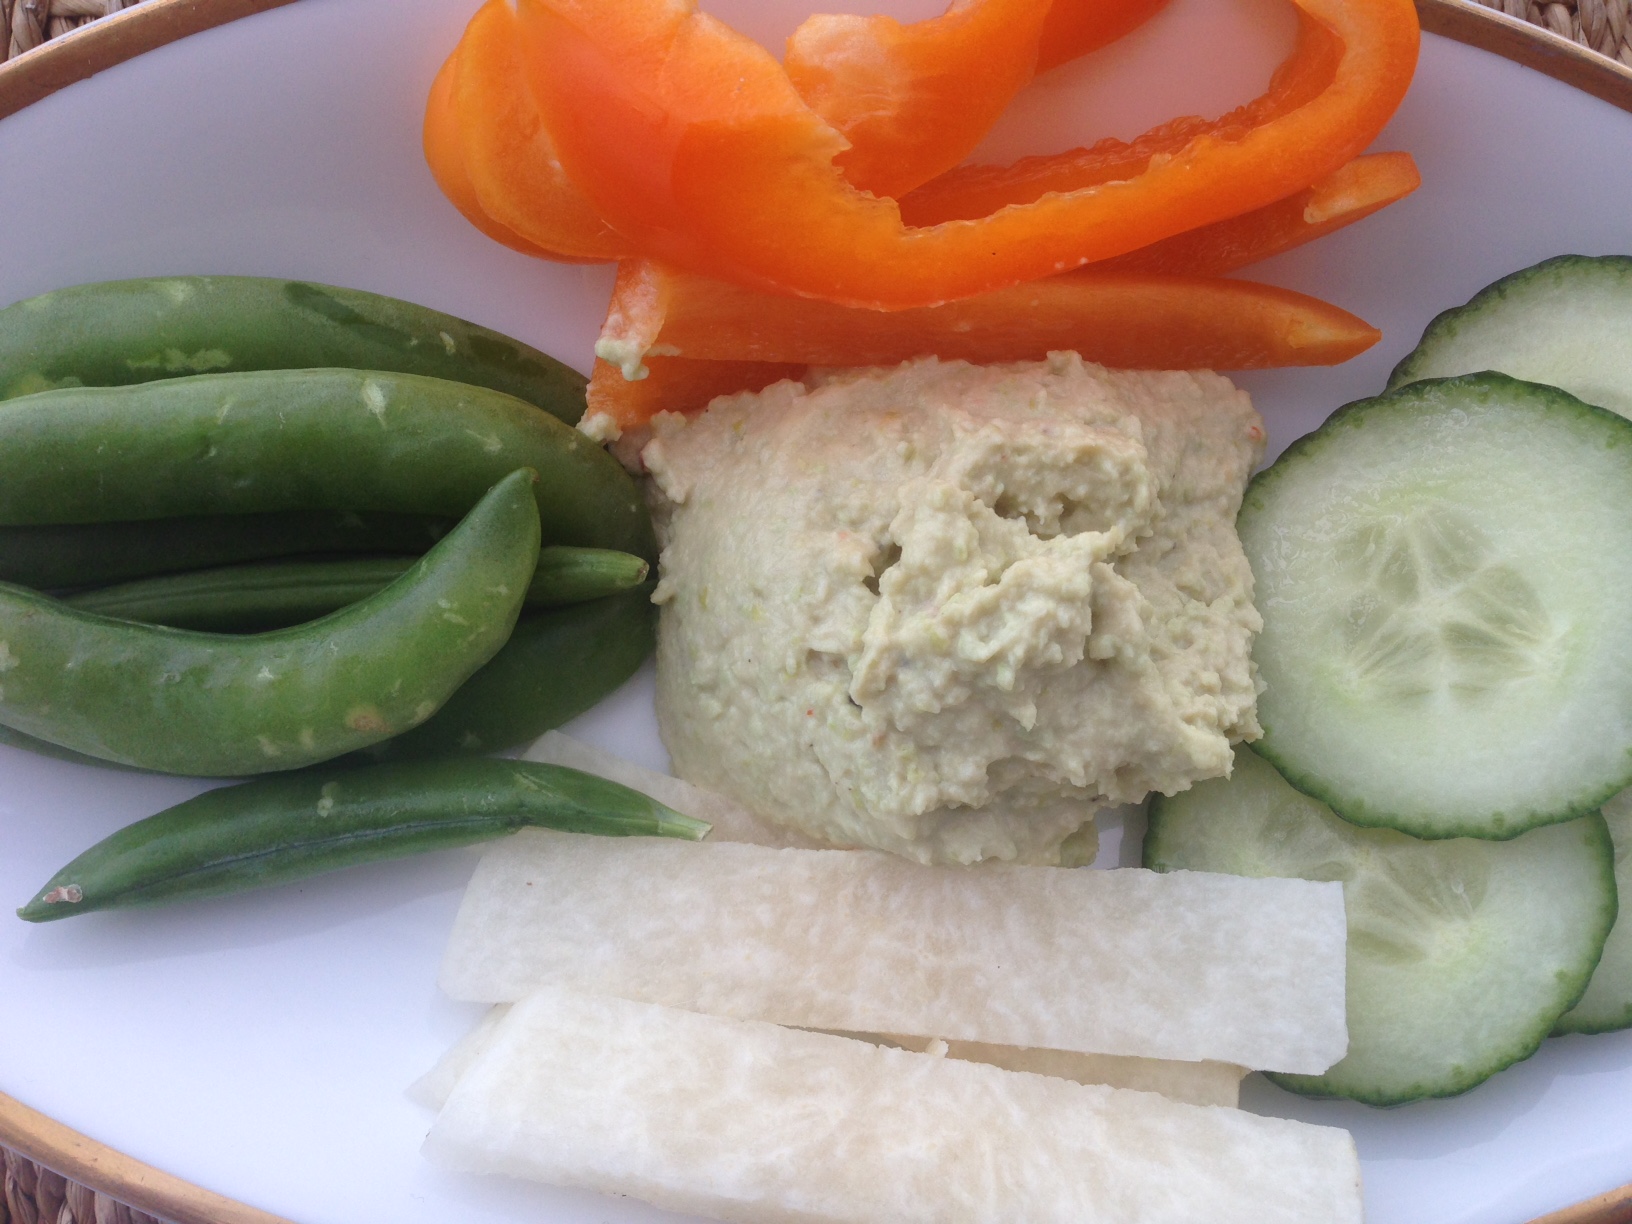
Get out of the rut of eating the same foods over and over again. When you are at the grocery store make it a habit to try a new fruit, vegetable or grain every week. Maybe try something you recall disliking as a kid and see what you make of it now. Not feeling very experimental, start with a different brand of apple, or type of potato. Get to know your spice rack to change the flavors in a dish you make frequently.

Having just come back from vacation I wanted to incorporate the persimmon into a dish I was already familiar with. Try this experiment next time you pick up a new food at the grocery store. Substitute it for something common in one of your favorite dishes. Keep it simple.

persimmon salad

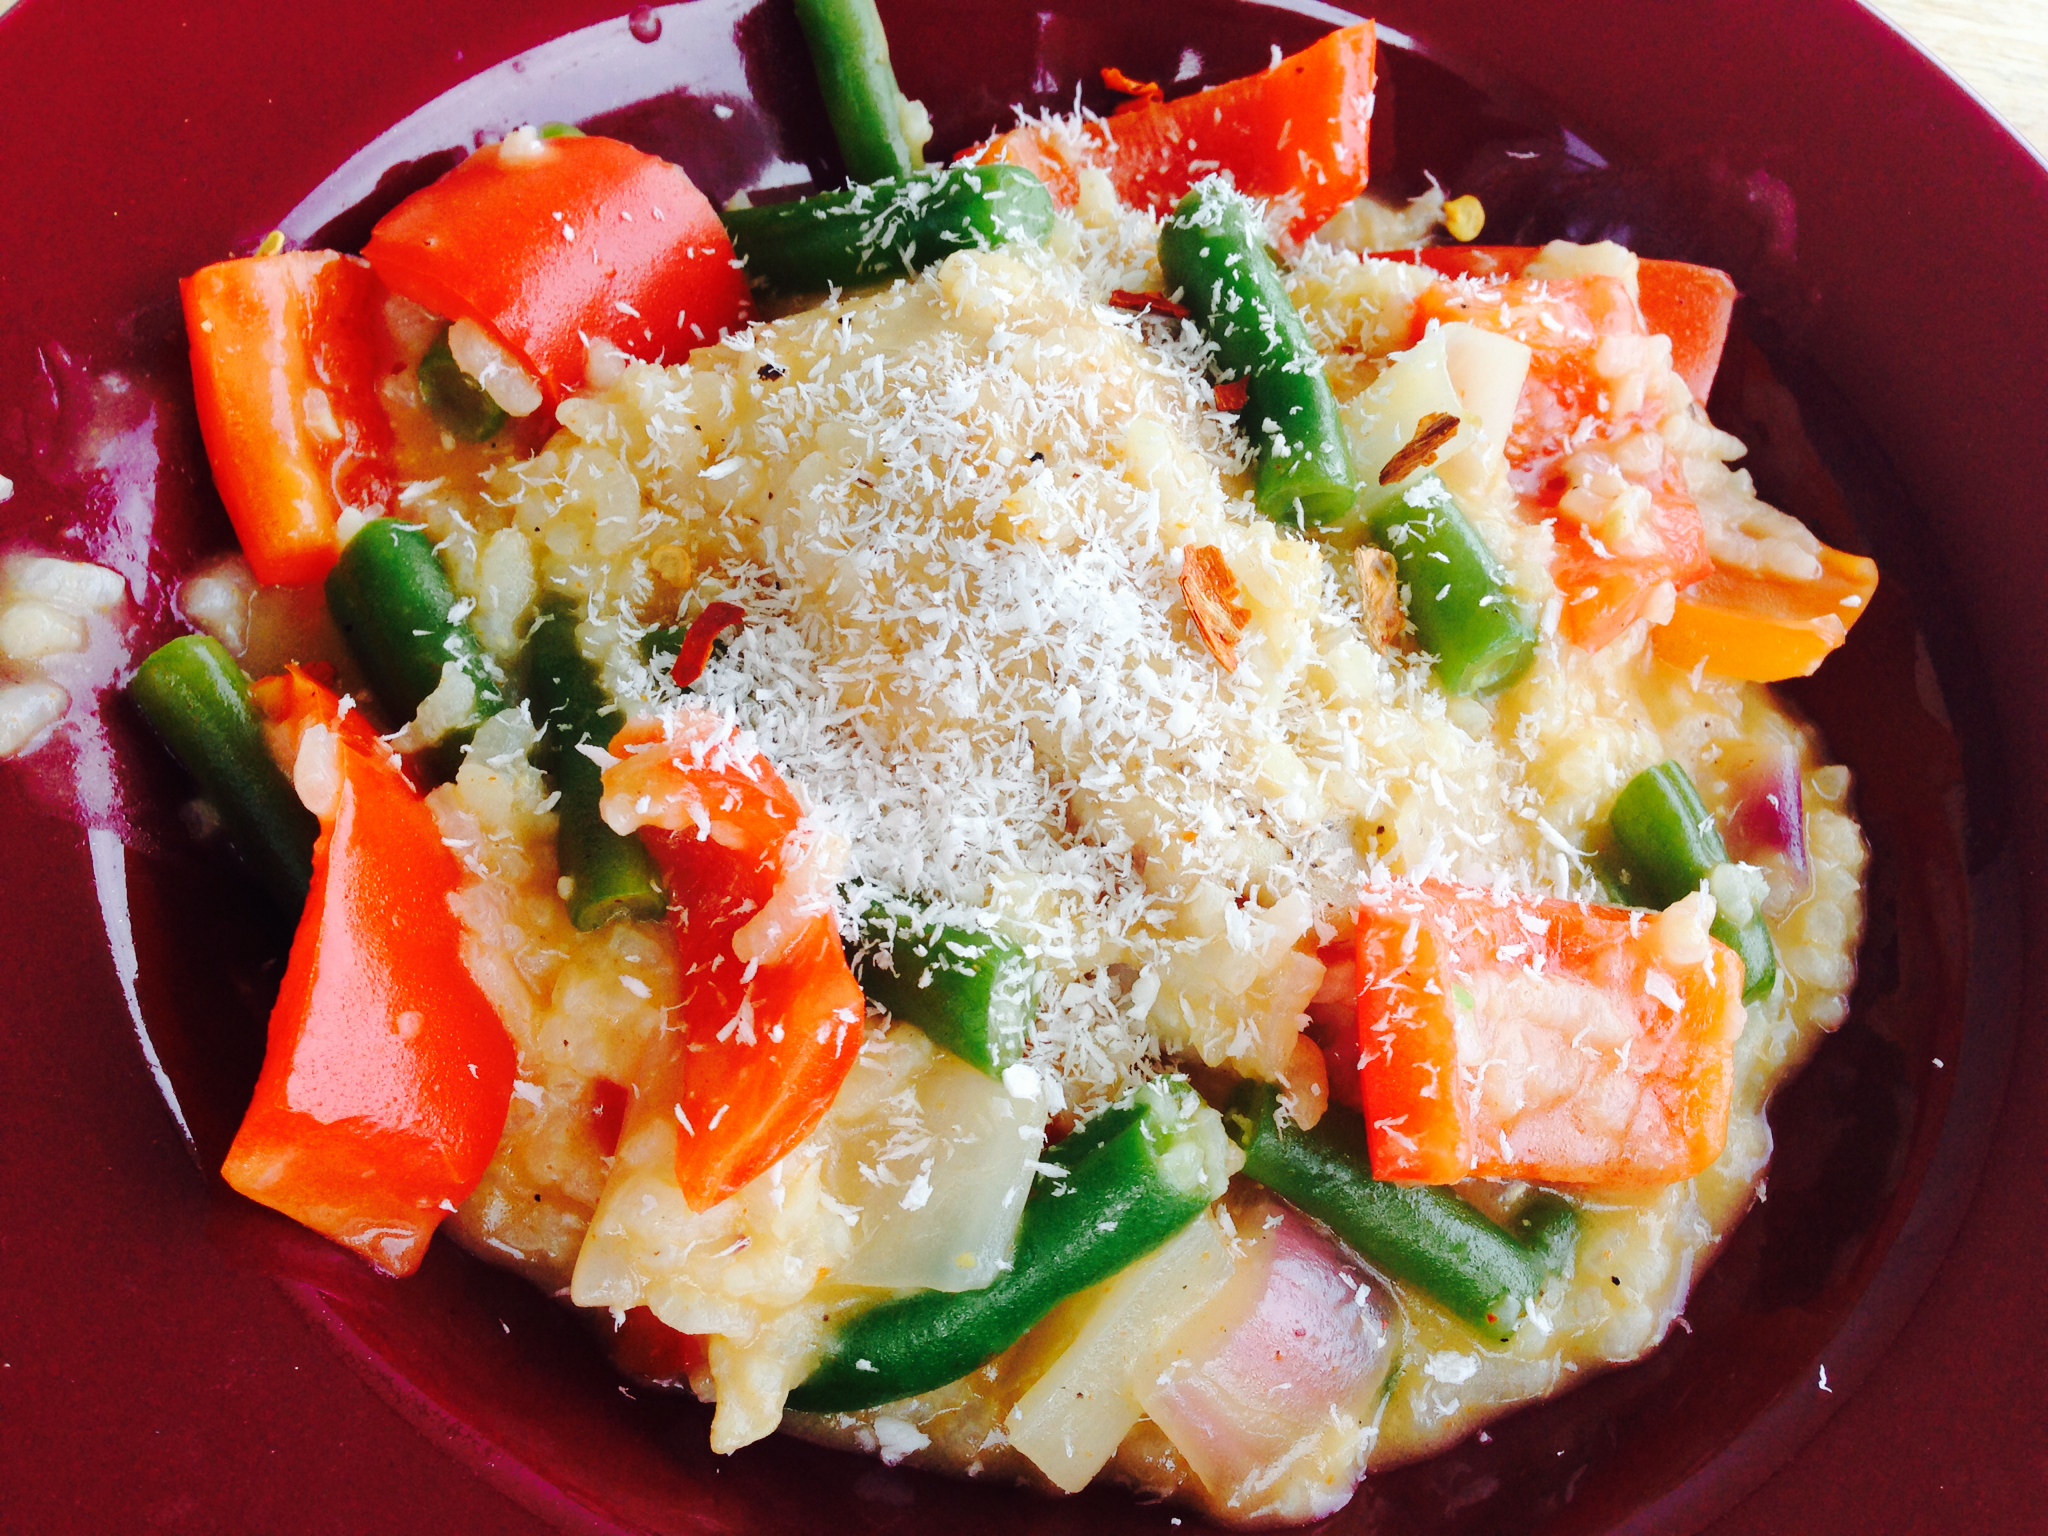
I had been eating fish all week in Hawaii and still wanted to keep on that path so I took my recipe for pecan crusted chicken and substituted tilapia. I served this over a salad of baby spinach, pre-cooked red beets, avocado, and substituted persimmon for orange sections. To add some depth to the flavor and texture I added homemade purple cabbage sauerkraut (so easy to make and it can be kept in the refrigerator for 6 months) and homemade sprouts. Before trying this dish I had no idea what to do with persimmon and now I have a new seasonal fruit to look forward to eating in the fall.

Some tips if you want to try persimmon. The fruit is native to China and was later introduced to California. Check where your grocery store fruit came from and try for as local as possible as opposed to Asian imports. It’s harvested in the fall in California and typically available through December. One fruit is about 70 calories and is a good source of fiber. It has anti-infective, anti-inflammatory, and anti-hemorrhagic properties. The orange color it a tip that it is high in carotenoids, helping to prevent age related macular disease. One fruit provides 80% of daily requirement for vitamin C. It’s a good post workout food as it is fairly high in minerals like potassium, manganese, copper and phosphorus. There are two common varieties, the hachiya (more astringent) and the fuyu (more sweet) shown in my recipe. The hachiya variety has a shape similar to a plum tomato and requires more ripening if you want to experience a sweet taste.

Now that I know I like the fruit and understand it's texture and taste I'm going to try it in a Caprese Salad. Give this a try and tell me what you think. http://www.treehugger.com/easy-vegetarian-recipes/persimmon-caprese-salad.html

Why I make my own hummus

I’ve noticed a growth in supermarket brands but was shocked to learn that the New York Times reported that the hummus industry has grown from just a $5 million dollar business 15 years ago to one that totaled $530 million in 2012. Traditionally hummus is simply chickpeas, tahini (sesame seed paste), garlic, lemon juice and some spices. So why are the labels so extensive for half the hummus brands I pick up to review nutrition data? Next time you shop for hummus notice the ingredient list. I’m not saying all store bought is bad but many include vegetable oils like soybean, sunflower, canola and even sugar.

I make my own for a variety of reasons including:

  • I have can easily have all ingredients on hand and it’s really quick to make.
  • It much cleaner and more delicious than store bough because I choose exactly what goes into it.
  • I have a healthy snack on hand- great for pre or post workout when I just need a little something.
  • When I take the time to make my hummus I also take the time to add a variety of vegetables to my grocery list so I have good stuff (not bread or crackers) to dip. It’s much easier to add vegetables to your diet when you don’t have to cook or prepare them. I suggest cleaning and cutting veggies for a few days supply when you make the hummus. When I’m tracking a client’s food log and notice lack of vegetables, this is one of my suggestions to get a jump on that.
  • Honestly don’t even care for dipping my hummus in bread.   I want the hummus because it’s so tasty, and the vegetable is simply the vehicle to get it in my mouth.
  • I can easily add other flavors to the basic recipe as the week goes by to alter the taste experience.
  • It can be a good condiment as I often add it to other meal that needs a little something creamy. Use it as a salad dressing; include it in a chicken or tuna salad instead of mayonnaise or some other overly processed condiment. Today I’m baking a portabella mushroom (this will bake during post workout shower) and adding a filling of tuna, celery and hummus. Add that on top of my leftover mashed sweet potato and I’m ready to get back to work.


Simple Hummus

hummus2 cans chickpeas (about 30 oz)

1/3 cup fresh lemon juice

¼ cup tahini mixed well

2 or more garlic cloves

1/8 tsp red pepper

1 tsp sea salt

Drain 2 cans of chickpeas reserving ½ cup liquid. Rinse beans then place in food processor.

Add 1/3 cup fresh lemon juice, ¼ cup tahini, 2 minced garlic cloves (or 1T jarred minced) 1/8 teaspoon salt and process. Slowly add the reserved liquid starting with a ¼ cup and varying the liquid based upon other items you may be adding and texture desired.

Add to the basic recipe with these additional ingredients:

  • Roasted bell pepper
  • Sun dried tomato and fresh basil
  • Cucumber and fresh dill
  • Olives
  • Artichokes (canned rinsed and drained) and steamed or frozen spinach
  • Edamame- in the picture shown I replaced a can of chickpeas with cooked edamame. Loved the texture and flavor.
  • Avocado (if ripe will add to the creamy texture and may be able to lessen the liquid in the recipe)

Although hummus has healthy fats, protein, carbs and a good amount of fiber its easy to get too much of a good thing. Keep in mind a cup of hummus is around 400-450 calories. Measure out the amount that is appropriate for your intended meal or snack instead of dipping right into the container

Turkish Get Up: Make it work for you

Since moving to LA I’ve been spending more time with my kettlebells because it feels so natural to train with them outdoors, and if you know me, I’m all about taking my workouts outside. There are a number of exercises I turn to when I’m through rehabbing an injury and want to strengthen my whole body so that it functions better. In my current case it’s my right shoulder that’s been feeling weak and my left ankle, which still is not a stable as my left. This is why I love the Turkish Get Up. It’s a great tool to gauge where I am (or a client is) with a recovery and has a number of amazing benefits.

  • It improves mobility throughout the whole body thus reducing general daily aches and pains
  • It improves stability of the shoulders in particular, which is key to keeping that joint strong and healthy.
  • It challenges coordination.
  • It works the deep abdominal muscles therefore strengthening your core from the inside out.

Once you’ve perfected the get up with a light weight it’s so rewarding you’ll want to see if you can perform with more weight next time.

The Turkish get up in is entirety is not a beginner exercise, but just about anyone can start with steps one and two and progress from there. You will see Get Ups also being performed with dumbbells and barbells, even sand bags! I prefer the KB because with the weight of the KB in hand, straight up over the shoulder, you will notice that the weight bears straight down over the shoulder as opposed to being spread out over a larger area as with a dumbbell or barbell making it harder to control.  If you don’t have a KB I suggest starting with a dumbbell, you can even benefit from performing the exercise with no weight at all. You could  hold onto a can of refried beans that have been sitting in your cupboards for months. -:)

The Turkish get up is not easy to perform. It can take weeks to just get from the ground to standing with proper form. Don’t give up. I can guarantee you will feel great and the reward for sticking with it will pay off. Please let me know how you are progressing.

Watch my tutorial video then follow the step-by-step photo instructions.

[embed]https://youtu.be/wBKypIUh-Yg[/embed]

Here are the steps of the Get Up broken down. I’m stating the steps with the KB in the right hand since most people are right hand dominant. After completing the exercise on the right move over to the left. Continue switching sides. At the point where you think you could take on more weight, don’t. Instead progress during your next workout by completing all planned reps on one side then switch.

For surface area do not use a mat, rather choose grass or gym flooring. Wood can be slippery from moisture so do not recommend that either. I prefer to go barefoot so the muscles in my feet assist me, leaving that up to you, but consider going barefoot if you are having a hard time transitioning between steps.

Lie on back with KB next to your right shoulder. Lift KB over R shoulder with arm straight and plant R foot on ground

getup1

Engage your abs, plant L elbow on ground about 2 inches away from your L hip. Use your R foot to assist in bringing your torso upright rolling from L elbow onto L hand. Keep eyes on the KB making sure the arm is still straight and extended over the R shoulder.

getup2


Roll onto side of L foot as you drive your hips up (think glute bridge with one leg straight and one leg bent).

getup3


This is one of the harder steps, swinging the L leg behind you to prepare yourself for a lunge set up. Keep the R arms straight over the shoulder, forming a T between the two arms. Keep your hips high and swing your left leg behind you.

getup4


Use your L arm to push off the ground, shift your L foot a bit so that your hips are facing forward. You are essentially in a lunge position with your L knee on the ground and L toes tucked under you. Keep that R arm straight up over the shoulder. Make sure your hips are squared off before you lunge up.

getup5


Lunge up to standing with feet together. You made it!! Now it’s time to Get Down.

getup6


Step the L leg back into a lunge bringing the knee gently down to the ground. Make sure the knee is well behind the L hip.

getup7


Keep your eyes on the KB and plant your L hand on the ground forming a T again.

getup8

Keep maintaining that T, keep the hips up off the ground and swing the left leg underneath your body driving the heel into the ground using some of the side of your foot for support.

getup9


Lower your hips back down to the ground but keep your bodyweight a bit to the left with your L hand supporting you.

getup10


Use your abs to roll back down paying close attention to a straight arm and KB still over the shoulder.

getup11

Straighten legs and bring the KB back down to the ground.

If at anytime the arm bends or the hand starts to swing away from the shoulder, bring the weight back down to the shoulder and reset. Just to get the body positioning. I highly recommend performing quite a few Get Ups with no weight at all. Work on the maintaining the hand position and body position. When ready for weight, start with steps 1-3. Master each step before moving onto the next. Notice the different challenges you have depending on which side the weight is held. Progress by performing 5 complete Get Ups per side before adding weight. Take it slow, but once you have it down you can pick up the pace as a progression.

At what point in your workout should you perform the Get Up? I suggest either finishing with Get Ups if it was a light workout, or somewhere in the middle when you are thoroughly warmed up, but are not feeling terribly fatigued. Don’t go into your get ups if your shoulders are tired.

Send me an email carlaweier@compleatfitness.com with questions or a progress report.

Balancing a meal with 5 essential flavors

Next time you have a great meal notice whether the 5 essential flavors are present. I find my meals more satisfying and I don’t crave more food, or sweet treats after if there is a balance of these five flavors plus fat. Sweet does a great job of giving a savory dish more depth, just like salt. Both salty and sweet tastes signal an intake of calories to our brain. If a dish seems too sweet, sour ingredients like lemon and vinegar will neutralize the sweetness. Fruits and root vegetables are good naturally sweet whole foods to include in your meals.

Bitter is a flavor many are not too fond of, but bitter foods are really good for us. It’s the compounds within the bitter foods that make them healthy like carotenoids in sweet potatoes and spinach, flavonoids in cranberries, and polyphenols in wine. Other bitter foods to incorporate are broccoli, kale, and Brussels sprouts.

Salty brings out subtle flavors you’d like to highlight and also diminishes flavors that are too bitter. Salty foods you may consider are soy sauce, miso paste, cured meats, olives, or cheese.

Sour is another flavor that tends to be hard to swallow, but just a small amount of lime or vinegar can brighten up a dish. Don’t confuse sour with bitter; the main difference is that sour is acidic. It generally doesn’t take much of a sour food to take a dish that is fairly bland and produce great flavor. Consider cultured dairy products, kimchi, sauerkraut, lemon, lime and vinegar.

Unami is the hardest flavor to describe. The word translates to mean “savoriness” and is often associated with meaty flavors and foods that are aged or cured. A seared red meat dish already has a unami quality, but if you are looking to make a vegetarian dish, or less flavorful chicken or fish dish more savory try soy sauce, fish sauce, miso paste, dried seaweed, beef or bone broth, parmesan, anchovies, tomatoes or mushrooms.

And what about fat? Although not on the list I feel fat should be another flavor or taste we should think about for food combining.

5flavors

Take a look at the salad in my picture. I’ll put this together and have if for at least 3 meals, adding different ingredients each day. It’s so easy to pull out of the refrigerator and eat right away after a workout and I can eat a tone of it. So satisfying! I also really enjoy the textures of the shredded vegetables, crunch of the seeds and bursts of flavor from the pomegranate. If pomegranate is not in season I like to substitute grapefruit.

3 heads broccoli = bitter

1 small head cauliflower

2 large carrots = sweet

½ cup sunflower seeds (unsalted)

½ cup pomegranate seed= sour and sweet

½ cup mint

Salt and pepper to taste

With the shred blade and a food processor shred the broccoli, cauliflower and carrots. Place in large bowl and stir in sunflower seeds, pomegranate seeds, chopped mint, and salt and pepper to taste. Do not over salt as the dressing adds salty flavor as well.

Dressing: combine all ingredients and whisk until smooth

¼ cup tahini = Unami (you can sub any natural nut butter)

2 T rice vinegar = sour apple cider vinegar works ok but I like a more subtle vinegar

2 tsp miso= unami and salty

1 T maple syrup or honey= sweet

¼ cup + 1T hot water

Toss dressing into salad.

Other things I may add for additional pleasure on other days: grape tomatoes, cucumber, avocado, shredded chicken, hardboiled egg, or canned tuna.

Start Saving at Jack Rabbit on Fitness Apparel and Gear

Jack Rabbit, my go to running store, is offering my friends and clients 100 points (valued at $10) when you sign up HERE  for their rewards program.  You can immediately redeem those points when you go to one of their four NYC stores. Jack rabbit has been around for years and has knowledgeable and friendly staff to assist you with all your running gear and more.  They have the most advanced shoe fitting service in NYC.  They will find the right shoe for you by asking lots of questions, getting you on a treadmill and then using video analysis.  And these services are free!

Aside from running shoes they sell gear for running, swimming, cycling and yoga.  They have technical apparel, wetsuits, training electronics, and a collection of general fitness aids.

With locations in Park Slope, W 14th street, Lex and 85th, and West 72nd street, there are multiple locations to choose from.  Sign up here and start shopping!  To redeem points simply just give them your phone number along with valid ID and you are good to go!

Take Oil Of Oregano to Fight Infection

I have a solution to battle oncoming sickness.  Was having a chat with a client who has been feeling rather blah lately as if she has allergies or a cold coming on.  I suggested she try Oil of Oregano, which I have been using for a year or so to stave off infections. Oil of Oregano is incredibly potent antiseptic and antifungal oil that has been one of the best-kept secrets of natural medicine.  You can use Oil of Oregano topically to treat acne and eczema.  You can dilute it and drink with water or place directly under your tongue to kill fungus, microbes, yeast and bad bacteria in your gut.  You can mix a little into a spray bottle and mist the bathroom and kitchen counter to destroy microbes.

I always take oil of Oregano on flights using a few times throughout the day to reduce chance of infection.  I also take more of it when I’m somewhere where there may be a lot of germs like the gym, at a music festival, or before a race.  Although I use a few drops every day for bacterial overgrowth prevention, its necessary to use more if you feel a cold coming on.  I find it clears my head immediately if I have a little nasal congestion.  Because It’s a bio-stimulant it can be used during a cleanse, as it assists in the cleansing process.

If this is all new news to you, here is a quote to back me up: “Researchers at the Department of Food Science at the University of Tennessee reported that, among various plant oils, Oil of Oregano exhibited the greatest antibacterial action against common pathogenic germs such as Staph, E.coli and Listeria.”  - Journal of Food Protection- volume 64.

Look for a variety that is at least 70% Carvacrol, such as Wellness brand.

My favorite 6 miler: Brooklyn waterfront pier to pier

Carla.LIC.PepsiFollow me along my favorite 6 mile route for running or biking. I’ll take you from Williamsburg through Greenpoint and LIC past restaurants and bars all the way to the historic Pepsi-cola sign.Starting out at Williamsburg N 5th street ferry,  head over to Kent ave and stick to the left side sidewalk and go north. As Kent becomes Franklin keep an eye out for shops, restaurants and bars to return to on another day. Every couple of months I’ll see something new! Stay on Franklin and look out for the bike signs to the Pulaski bridge making a right on Eagle. Eagle will dead-end onto the Pulaski overpass. It’s quite narrow, check over your shoulder for cyclists when you pass someone. This is your only hill, so put some work into it and enjoy the view over our lovely Newton creek watershed as well as the midtown tunnel traffic. As urban, smelly and congested as this part is, it’s worth the reward on the other side. The bridge descends on to Jackson Ave where you turn left (this is the 2 mile mark) and then a right onto 51st ave. 51st ave takes you directly to the waterfront park and the LIC ferry terminal. There are concessions there, water, and I believe bathrooms. From here just explore the multiple paths along the water. There are places to stop, recline on a lounger, sit in the grass and enjoy the Manhattan views. If you make it the old Pepsi sign you have gone 3 miles. Let me know if you find anything worth returning to and I’ll join you!

Cooking and Multitasking

A topic that comes up from time to time with my clients is how to find time to cook a whole foods meal post workout.  I had this situation arise myself recently and thought I would share how I managed to cook, stretch post workout, take a shower and fold laundry all within 50 min! I had started preparation for a meal on a Sunday afternoon but by time dinner came around our plan had changed and the meal was not going to get cooked.  On Monday afternoon, I was on my bike in Central Park and negotiating how I was going to manage getting this meal cooked.  I’m strict about refueling within an hour of a workout (in this case a 2 hour bike ride) and sometimes turn to shakes and snacks, although they are great supplementation, sometimes these post workout mini meals turn into extra calories that I would prefer not to consume.

So here is the Spicy Coconut Chicken Casserole that I cooked, and the steps I took to get it all done in 50 min.

Spicy Coconut Chicken Casserole

This was originally a Martha Stewart recipe.  This serves 8 small dishes (1thigh each) or 4 large dishes. Nutrition data is for 8.

Ingredients:spicyCoconutChicien 1 Tbsp coconut oil 3 lbs chicken thighs 1/2 tsp sea salt 1/4 tsp black pepper 13 1/2 fl oz coconut milk 2 tsp curry paste 1 cup Arborio rice 2  bell pepper (red) 8 oz green beans 6 oz red onion 1 1/2 cups chicken broth

Directions:

You can use chicken thighs or drumsticks. Arborio or jasmine rice are good choices. I used light coconut milk and went with red curry paste, 2-3 teaspoons is just a guide.

1.  Start with prep work and cut all veggies into 1-inch chunks or pieces. Skin chicken and trim the fat.

I completed these steps the day before.

2.  In Dutch oven or heavy pot, heat oil over medium-high heat. Season chicken with salt and pepper. Working in two batches, cook chicken until browned 3-4 min per side. Transfer to a plate.

While browning the chicken I brought my mat into the kitchen and stretched for a good 15 min, longer than I would usually stretch.

3.  Scrape chicken bits from bottom and add coconut milk, broth, 1/2 cup water, and curry paste. Taste and adjust spice while bringing to a boil. Stir in rice. Add chicken and any remaining juices arranging pieces in a single layer.  Cover, reduce heat to medium-low. Cook, without stirring until rice is done, about 15 min.

I made sure heat was adjusted and would not boil over.  Took my shower and dried my hair for 15 min while this simmered.

4. Scatter bell pepper, onion, and green beans on top, cover, and cook until vegetables are crisp tender, 8-10 min. 

I folded laundry and cleaned up around the kitchen for the last few minutes of cooking time.

Calories 385; fat 17g; saturated 7g; carb; 28g; protein 23g

Done!  Within 50 min post workout, got a great stretch in, got cleaned up and was refueled in less than an hour.  Plus this simple one dish meal gave me plenty of leftovers for the rest of the week.

10 Reasons for incorporating stretching into your daily activities

These 10 reasons for incorporating stretching into your daily activities should inspire you to keep reading and watch my video at the end.

  1. Helps improve flexibility and increases your range of motion through the joint.
  2. Improves mechanical efficiency and overall functional performance.  If the muscles surrounding a joint are flexible the body can move through a wider range of motion with less energy, allowing for better performance overall.
  3. May slow the degeneration of joints.  By reducing stiffness you improve the range of motion around a joint
  4. Has the potential to decrease injury by preparing muscles for work prior to activity.
  5. Increases blood and nutrient supply to muscles, as a result generally reducing muscle soreness post exercise.
  6. May reduce the risk of injury, as a flexible muscle is less likely to become injured.
  7. Calms the mind by providing a mental break.
  8. Helps reduce stress as a well-stretched muscle holds less tension therefore leaving you feeling less stressed.
  9. By lengthening tight muscles you are assisting in correcting postural imbalances.  By focusing on the muscles that are tight due to daily activities, or inactivity you can counteract poor posture and allow the joint to function normally.
  10. Decreases the risk of low back pain when you focus on the muscles attached to the pelvis.

With the last two points in mind I have put together 4 simple stretches you can do just about anywhere.

Hamstrings are tight on just about everyone, whether its from sitting too much, doing lunges, deadlifts, step ups or sports like running and cycling.

Hip Flexors are tight on most people who sit for long periods of time.  Often you don’t feel this tightness until you go to do something, for instance a lunge.  Often I cue a client for a lunge and ask them to focus on the glute activation but instead they feel tightness in the hip flexors on the front of the opposing leg.  Often the overactive hip flexor prevents the gluteus complex from doing its job fully. 

Chest and anterior deltoids are tight from the shoulder being internally rotated while driving, sitting, and typing.  Also an area that is often overlooked because it doesn’t feel tight until you go and stretch the area.  A simple test is to just stand with your arms by your side.  If your palms face more toward the back of the room then you are internally rotated and need to focus on stretching this area.  If your fingertips face inward or even a little forward you are doing something right. 

Spine and muscles along the spine like the multifidi and erector spinae need regular movement to stay mobile.  Any position that gets held for long periods of time is not good for the spine.  This could be sitting at a desk, standing with poor posture, leaning over on a bike. 

There are many stretches that work well for these four areas but I have given you actions that can easily be done in sequence throughout your workday or at home.   I’ve chosen to show you a video where all you need is a chair.  Check out my 4 chair stretches video.


Avocado Toad in a Hole with Sweet Potato Hash

Eggs, avocado, and sweet potato!  Yum.  I don’t keep bread in the house but always have avocado on hand.  In this recipe I substitute nutritious avocado for bread and make a better carb choice with sweet potato.

 Serves 2:

1 large sweet potato 1T + 1tsp coconut oil garlic powder onion powder (optional) dried herbs (optional) salt pepper 4 large eggs 1 large avocado

Cut sweet potato lengthwise so it will fit in a food processor tube.  Use the shredder blade.  Combine shredded sweet potatoes, and herbs in a bowl.  Add 1T coconut oil to preferably an iron skillet.  Once nice and hot stir-fry potato for one minute then place lid on top for a few more minutes.  Hash is done when some of the hash is brown and texture is soft. 

Cut avocado in half lengthwise, and then in half again.  Remove skin.  2 slices will have a hole where the seed once was.  Dig a hole in the other two slices.  Place the remaining teaspoon of oil in a skillet and warm.  Place avocado slices on the skillet.  Brown slightly and turn.  Drop an egg in the middle of each slice and cook as desired adding salt and pepper if you wish.

Check out this great site for all you could possibly want to know about avocados.